Blogi loki päiväkirja
Dima's diary about anything
3D modelling, 3D printing, FPV, electronics, photography, life
FPV (cheapo) monitor

I needed some small, simple handheld FPV monitor for the cheap price. Found on Banggood RX5808 receiver with 5″ display, but all the cases I found are ugly and not so handy. So got an inspiration to design my own version. And here it is! Feel free to download and print it yourself 🙂 Total price is under $30 and your time.


I’ve done a test with tiny whoop’s 260mAh lipo battery. It lasts for half an hour. So with over 3000mAh Li-Ion, you can get an operation time almost for 6 hours!
Here is the BOM list:
- RX5808 5.8G 48CH FPV Receiver with 480*320 5 Inch
- 3 Pins Toggle Switch AC 125V 6A 2 Position SPDT
- Broken brushless motor
- Wires
- M3 bolt, at least 10mm long
For SMA connector you can use the one that came with the monitor set. It’s RP-SMA if it suits you. Otherway get some SMA pigtail connector. Google 🙂
Get monitor case parts from Thingiverse.com/thing:3128096
Assembly instructions
Tape the PCB to the display with double-sided tape. Put the flat cable under it.

Get a broken brushless motor and rip two magnets from it. Grind them with the sandpaper for a better connection.
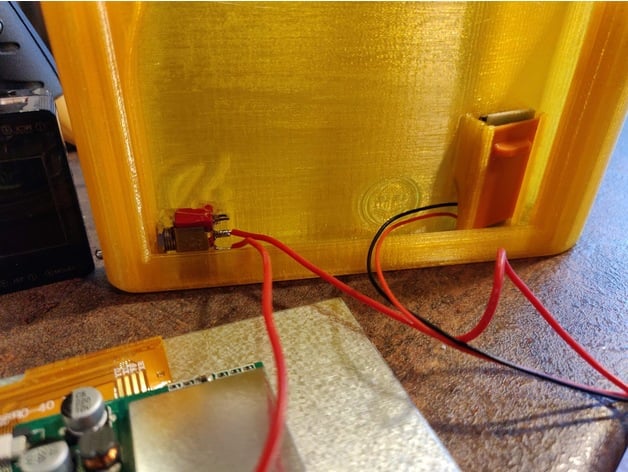
Solder black and red wires to each magnet. Glue the black wired magnet to the bottom of the Li-Ion holder.
Solder black wire to the GND pad of the PCB.
Solder red wire with the magnet to the toggle switch’s centre pin. Solder another red wire to one of the side pin of the toggle switch. Solder another end of the red wire to PCB’s VBAT pad.
If you want to keep RP-SMA connector, just keep it. Or change to SMA version. Mount it to the cover. The 8mm socket wrench helps a lot 🙂
Cut an empty side of the button panel to make it shorter. Do not cut over the traces. Put its plug and wire through the hole on the bottom of the mount and place the panel. Slide the panel lock behind the button panel.
Keep one nut on the toggle switch and put inside the switch hole on the side of the case. Adjust with the nut how far switch’s toggle will come outside with your preference. Hot glue it to the place.
Slide the Li-Ion holder to the case.
Arrange the wires behind the display and slide it to the case.
Insert 18650 Li-Ion battery negative side on the bottom. Connect “red” magnet to the positive side. Check to see if the monitor works.
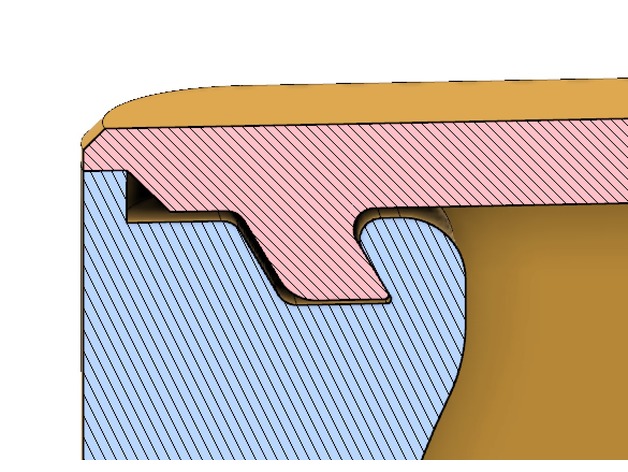
Put on the cover. There is an angled lock on the left side of the cover. You have to slide the cover in a 45-degree angle from top left to bottom right.
Screw the M3 bolt and it’s done!

Add some 5.8G antenna 🙂